Saturday 31 May 2014

Make All The Things! Felt Cushion / Pillow Tutorial

Last weekend my To Do list read "MAKE ALL THE THINGS!!!"

I took this a bit literally, and decided to decorate a cushion with this exact phrase ... to help me remember to make more time for being creative, to not let admin take over my schedule, to do more making and less faffing about worrying about what project I should start next... and, well, just generally to encourage myself to make all the things.

Here's the finished cushion...


... I love it! Honestly this cushion makes me smile every time I see it, it's an awesome addition to my studio. 


To make your own, you will need....

- A plain cushion (pillow) cover.  I used a canvas cushion cover bought at H&M (affordable and available in lots of different colours, hurrah!) that measures 40 x 40 cm (16 x 16 inches).

If you want to you can, of course, make the cushion cover from scratch. There are plenty of cushion-making tutorials available online or in sewing books :)

- Felt in a constrasting colour to your cushion (you'll need two or three sheets/squares of felt)
- Sewing thread to match the felt, and a contrasting shade for tacking
- A needle and pins
- Sewing scissors (I used embroidery scissors, which are great for cutting out felt shapes)
- The templates provided at the bottom of this post. If your cushion is larger or smaller than mine just enlarge or shrink the templates as needed.


To decorate the cushion...

1. Use the templates provided to cut out the felt letters. 


2. Arrange the letters on the front of the cushion cover (or the fabric you'll be using to make your cushion) and carefully pin them in place. Note how I've left space around the edge of the letters, to allow for the 3D shape of the cushion.

Take care not to pin the front and back of the cushion cover together when pinning on your letters!


3. Use a contrasting shade of thread and large stitches to tack the felt letters in place, removing the pins as you sew. The tacking stitches will hold the letters in place and make the cushion much easier to handle (no getting pricked by pins when sewing!). Make sure you don't sew through both layers of the cushion.


4. Use matching thread and whip stitch to sew the felt letters to the cushion cover. This is nice and easy if you're sewing onto fabric-to-be-turned-into-a-cushion but sewing on the front of an already-sewn-together cushion can be a bit fiddly so take your time... and, again, make sure you're sewing through just the front layer of the cushion!


5. If you're making your own cushion, now's the time to take your appliqued fabric and follow the cushion-making instructions. If you've used a ready-made cover like me, all you need to do now is add the cushion insert and ta da...


... one slightly bossy cushion to put on your sofa to remind you to make stuff! :)


Click on each template sheet to view it in another tab or window. Make sure you're viewing the image at full size, then print it at 100%.


This tutorial is for non commercial use only: you can use it to make as many crafty cushions as you want for yourself and as gifts, but please don't make any for sale. You may borrow a couple of photos if you want to blog about this project, but remember to credit me and link back to this page on my blog, and do not reproduce my entire tutorial / share my templates on your site. Thanks!

Enjoyed this free tutorial? Buy me a "coffee" and help support my blog!

Buy Me a Coffee at ko-fi.com

Subscribe to my newsletter for a monthly free pattern and visit my crafty tutorial archive for lots more free projects.

Visit my shop to buy my printable PDF sewing patterns:
Friday 30 May 2014

Guest Post: How To Remove the Image Border / Shadow in Blogger

Today's guest post is a useful blogging tip from MJ who blogs at Little Panda Crafts...

-----


Hello everyone! My name is MJ and I blog over at Little Panda Crafts. Thanks so much to Lupin for having me here! 

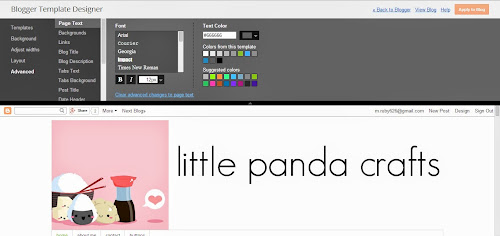
Today I wanted to share a blogging tip with you all. Do you have that image border or "shadow" that pops up automatically whenever you post a picture? Like this:


At first, I really didn't mind. Then..it started becoming annoying. I wanted to get rid of it...but how? Turns out you can do it with these few easy steps!

1. Go to Blogger. Click on Template, then Customize.


2. Once in Customized, click on Advanced.


3. Scroll down through the choices in Advanced until you see Add CSS. Click on it.


4. Paste the following code into the text box:

.post-body img, .post-body .tr-caption-container, .Profile img, .Image img,
.BlogList .item-thumbnail img {
  padding: none !important;
  border: none !important;
  background: none !important;
  -moz-box-shadow: 0px 0px 0px transparent !important;
  -webkit-box-shadow: 0px 0px 0px transparent !important;
  box-shadow: 0px 0px 0px transparent !important;
}


5. Make sure you hit Enter after the } or last character. Then click Apply to Blog.


And there you go! No more annoying image border/shadow!


I hope you all enjoyed this tutorial! Please let me know if it worked for you, or if you have any questions. Thanks again to Lupin for having me guest post today! :)

Love love love! MJ

-----

MJ is a blogger who loves crafting, writing, and meeting new friends! You can visit her blog at www.littlepandacrafts.blogspot.com to find more crafting or blogging inspiration, or just to chat :) She's also on Pinterest & Bloglovin.

Fancy taking part in my Guest Post series? Click here for more info.

Thursday 29 May 2014

Piccadilly, Covent Garden & The Estorick Collection

A few weeks ago lots of awesome bloggers were in London to attend Blogtacular. I sadly couldn't make it to the conference itself (I have my fingers crossed that there'll be another one next year!) but managed to meet up with a couple of lovely ladies who were in town for it - Alex of Hydrangea Girl and Maria of Dinki Dots.

I had a bit of an early start as I live outside of London and had arranged to meet them at a cafe on Piccadilly at 9am, so we could squeeze in some chatting and sightseeing before Alex had to go to the airport. This seemed like a perfectly sensible plan at the time we were planning it, but I definitely needed a cup of tea when I got to that cafe!

We walked to nearby Covent Garden, where the markets were just starting to open up for the day...


 ... peering in the windows of all the smart shops, chatting about making and blogging and about all the awesome stuff Alex & Maria had got up to at Blogtacular... and, of course, (typical bloggers!) taking lots of snaps for our blogs / instagram, etc :)
 

After years of visiting the busy markets on Saturdays in my teens, it was slightly weird to be back there when it was so quiet!

On our walk back to Piccadilly we stumbled upon a Puppet Festival which looked rather wonderful but we couldn't stay.


There was just time for a stroll along Piccadilly, peering into more shop windows...


... and walking through some of the fabulously fancy arcades...


... before saying our goodbyes as Alex & Maria headed back to their hotel and then home.

I know I say this a lot but man, it is so great to meet up with other bloggers and to be able to have a good natter about the weird and wonderful world of blogging with real live lovely, funny people instead of just reading each others blogs and chatting with teeny avatars on Twitter, etc. (Which reminds me, you are all coming to this, yes??)

I had a looming deadline so I couldn't stay in town for the whole day, but the super-early start meant I managed to squeeze a bit more stuff in before heading home for a late lunch and a few hours work.

First up, I got the Tube to Kings Cross St Pancras. Last time I travelled via this station my dad told me off for not taking the time to go inside St Pancras itself and have a look around. "It's amazing!" he said, and he was totally right.


Just down the road from St Pancras is the British Library which is architecturally a bit of a let-down after the splendour of the station... inside though, what treats! Book heaven.


I'd been for a flying visit earlier in the year and had resolved to come back for a longer visit, and I'm very glad I did. After a quick visit to the Beautiful Science exhibition I had a lovely long look around the gallery of the Library's treasures, jaw literally dropping at some of the amazing old books and manuscripts on display and feeling quite thrilled at seeing so many early editions or first drafts of famous texts.

My final stop for the day was just one stop along the Tube, in Islington. The weather wasn't too great, but it was still nice to walk along some unfamiliar London streets as I headed for...


... the Estorick Collection of Modern Italian Art. This is apparently Britain's only gallery devoted to modern Italian art and is one of those places that I'd never have visited (and probably never even heard of) without my Art Pass.


I enjoyed the exhibition of paparazzi photos of Hollywood stars in Italy in the 50s and 60s, and learned lots about Futurism while exploring the permanent collection (nerd that I am I carry a little notebook with me on my Nice Days out to write down interesting and/or fun facts learned in the museums, galleries and exhibitions I visit). 

It's a small gallery but an interesting one and entry is half-price with an Art Pass (hurrah!). Like so many small museums and galleries, its smallness means you can end up with whole rooms to yourself and can stand or sit quietly thinking and soaking up some culture. They have a cafe too, though I had to get home to work on my deadline so had no time to stop and sample their wares.

It was a bit of a shame to have to head home and not have a chance to explore Islington a little, as I would if I'd had more time, but I guess I shall just have to plan a return visit!

Wednesday 28 May 2014

Less 365 Project Progress Report: Falling Behind

As you might guess from the title of this post, I've fallen behind with my decluttering project, Less 365.

I hit the halfway mark at the end of December so, if I'd managed to stick to my "declutter one thing a day, every day for a year" challenge I'd be nearly finished by now... but sadly, this is not the case. On my decluttering calendar I'm only up to 16th February, and in the real world it's nearly June already! Eeek.

So far this year I have decluttered...

Three almost-broken bracelets, a bangle I loved but haven't worn in at least a decade, two books of cartoons I haven't read for just as long, two now-empty storage boxes, a pair of heels which looked amaaaazing and were super comfy but (like all heels do) still made me fall over, a notebook that was so fancy I was too scared to actually write in it, a hardback copy of a book I owned in paperback, three exercise books I don't need, a cardigan that shed mohair fluff everwhere...


... a smart cardigan that I panic-bought to wear to a wedding but which turns out to be super itchy, two craft magazines I'd finished with, thirteen craft books I've reviewed but which I'm honestly never going to make anything from, twelve DVD box sets I'm not going to re-watch, a pile of fabric squares that never made it into my patchwork quilt (and which weren't nice enough to be worth keeping)...


... four pairs of shoes which I never wear because they don't actually fit me very well, a vintage plate I don't really love, and a pack of cute drawing pins which I don't need (because I own another identical pack and approximately a gazillion normal drawing pins, and only have one smallish pinboard!).

As always, some things have been gifted to friends and family, some sold on Ebay, some taken to the local charity shop and others thrown away or recycled. 


This is my second year attempting a Less 365 Project (you can read about the first year here) and I knew it was going to be a challenge when I started, especially as (of course) the more stuff you declutter the harder it becomes to find things to clear out, and the harder those "yes, I definitely don't need this anymore!" decisions become.

I am very pleased that I have managed to clear these things (and the previous six months worth of decluttered bits and bobs) out from my space where they were sitting un-used, un-loved or no-longer-needed... but it's still a bit frustrating to have hit a wall like this.

The joy of self-set challenges though is that you made the rules, so you can change them! Hurrah! So, my Less 365 Project will be continuing... just a bit more slowly. Instead of feeling like I'm falling behind, or failing at my challenge, I'm just going to keep on going gradually until I've hit that "365 things" target.

I love how this challenge is helping me look long and hard at all my "stuff" (like lovely-but-uncomfortable shoes which are not magically going to become comfortable or magically turn back into the money I paid for them), to make long-overdue decisions like "do I finally mend this or get rid of it?" and to clear some space to better display and enjoy the things I'm keeping. A delightful side-effect of thinking a lot about decluttering is also that it's also helping curb my spending on buying new "stuff", which is great for my bank balance and saving me some more pennies to spend on wonderful Nice Days Out.

These are things that are worth doing, no matter how long the "challenge" takes!

I have no clue how long it will end up taking but eventually I will have cleared out all three hundred and sixty-five things from my space... and I'll let you know when I get there. Wish me luck! :)

Tuesday 27 May 2014

Getting Ideas Out of My Brain and Into Felt-y Reality

I have so many projects that I've been thinking about making for aaaages. I need to stop faffing about and just make them so I can share them with you guys!! They're no use to anyone just sitting in my sketchbooks (well, I say sketchbooks but I mean "scribbled on the scrap pieces of paper I had to hand at the time I had the idea").

So, on Sunday my To Do list read, in full "MAKE ALL THE THINGS".

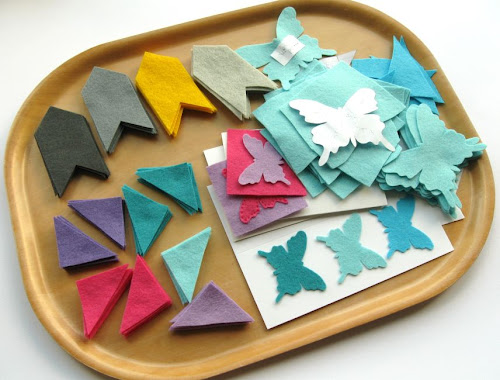
I made a good start! I cut out lots of felt...


... for a whole bunch of different projects.


I then took my To Do list a teeny bit literally, sketching out a quick pattern and cutting out a bunch of felt letters...


... so I could make a permanent reminder to MAKE ALL THE THINGS.


Tutorial and pattern coming as soon as I've finished stitching it :)

Monday 26 May 2014

Yummy New Yarn

When I ordered some yarn for a new project last week I couldn't resist adding some extra colours to my shopping basket. I'll be blogging about the other yarn I bought (and the project I've got planned for it) very soon, but in the meantime... look at these yummy colours!


I am so in love with these sorbet shades. I'll be using them to knit super simple blanket squares, which is something I find incredibly relaxing... and which is the only kind of knitting I can manage at the end of a long day. Anything more complicated than knit knit knitting to the end of each row when I'm not 100% awake and there are dropped stitches and wrong stitches before you can say "you should have chosen a simpler project".


I've got a bunch of squares in bright colours already knitted - some knitted when I was a teen (which was a while ago!!) and some knitted more recently with leftovers from other projects - and these four colours will be a nice addition to my slowly growing collection. They'll eventually become a blanket like these ones I knitted earlier.

Sunday 25 May 2014

The Fashion & Textile Museum and Borough Market

A couple of weeks ago I met up with the lovely Charlotte of Displacement Activity for a Nice Day Out in London.

Charlotte & I have known each other through Etsy and blogging for years but (apart from briefly bumping into each other at the station on the way home from last year's Festival of Quilts) we'd never actually met before. It was great to finally do so, and to have some excellent company for the day!

We met up at the Fashion & Textile Museum, for a visit to their (now ended) Artist Textiles exhibition.


It feels a bit mean to be saying this on my blog when the exhibition has now finished, but I'm really glad I got the chance to see this! I'd heard great things about it from other crafty bloggers and I wasn't disappointed. Lots of really interesting prints from different artists and eras, and a nice mix of fabric panels and items like dresses made with the fabric.

I also really enjoyed the display of Sarah Campbell's beautiful and colourful work, which showed the development of some of her commercial designs from sketches to finished product.


I'll definitely be keeping an eye on the exhibition programme at the Museum. More textile-focused exhibitions to visit? Yes please! Their next exhibition, Made in Mexico, opens on 6th June.

The Fashion & Textile Museum is on Bermondsey Street, which is rather smart with lots of lovely cafes to choose from for lunch. If you want you can pick up a free "fashion heritage" map in the Museum (or download it here) that you can follow for a self-guided tour of the area, exploring a bit of the history of its fashion & textile industries. We just went and had a nice lunch :)

 
After lunch, we headed to nearby Borough Market which is somewhere I'd not visited before.


It turns out to be a foodie paradise. So much amaaaazing looking food, both pepared and fresh, with lots of ingredients/varieties that I'd never even heard of.


Quite mouth-watering, and all in a wonderful setting!


Then we walked to the river...


... and strolled along the South Bank...


... to Tate Modern where we looked at some art (resisting the urge to climb on it, of course). We spotted some knitted pieces, and some paintings that would make great quilts. Then there was just time for a cuppa and some cake (mmm... cake...) before we headed home.

Textiles, art, food, tea, & lots of nattering - what more could you want from a day out?